What new filter caps will and will not fix
Plus: tips on reducing noise by re-wiring point-to-point circuits

Imagine you are making orange juice. When you squeeze the oranges, you end up with a lot of pulp and maybe some little seeds. You can use a little strainer to filter out the pulp and the seeds. Or, you can leave them in. Why not? It won’t kill you to drink pulpy, seedy orange juice.
But imagine you decide to strain the pulp and the seeds. Maybe you don’t like pulp. Maybe you want to serve it to guests who would be offended to find a seed in their juice. Whatever your reasoning, you now have a glass of pure, homogenous orange juice. So, this orange juice is fine to drink at any time, right? You strained it once, and now it’s pure forever? No. Someone could walk past, take a little sip, and put it back. If you leave it on a room-temp countertop for too long, bacteria will start growing in it. A fly might swing by to investigate the sugar content, fall in and drown. There are probably thousands of ways to contaminate a glass of juice.
In an amplifier, filter capacitors are like the juice strainers of the circuit. If your strainer is old, rusty, and full of holes, it won’t filter your juice properly. But even if you throw it away and buy a new strainer, you can only trust that your fresh orange juice is free of harmful debris at the moment of straining. Bad stuff can still get into the juice after it has been strained.
Likewise with filter caps: if they’re old, they may not work. But, if the hum is entering the circuit outside of the filter stage, replacing filter caps will not do much to clean up the signal.
This doesn’t mean that replacing the filter caps was pointless. You can still filter pulp from orange juice with a rusty strainer. The problem isn’t that it can’t do the job it was designed for—the problem is that the rust introduces unpleasant secondary consequences. Likewise, not replacing filter caps introduces unreliability in the amplifier.
Just like there are options for de-rusting old kitchen tools, there are procedures for re-forming filter caps so that they can enjoy a new lease on life. But replacing them is a lot easier, with zero detriment to the amp’s vintage tone.
And another thing: at what point is the orange juice too gross to drink? Outside of rare and far-fetched cases, none of the scenarios I listed above are objectively dangerous. It’s really up to personal preference. A five-year-old is probably going to draw the line at pulpy juice. Most people would tolerate their spouse taking a sip of the juice, but would throw it away if a random person at the diner did it. I personally will not drink orange juice that is even approaching room temperature. Flies are a dealbreaker for a lot of people, I’m sure…and a lot more have a fish-it-out-and-forget-about-it policy. Etc.
Similarly, people have different philosophies about hum. Some people don’t mind an audible noise floor, some people are happy to record around it, and some people demand electronics that are neither seen nor heard.
Wurlitzer’s philosophy on hum is actually pretty clear. If the amp was a glass of orange juice, it would be freshly-squeezed, freshly-picked, sweet, tart and vibrant. And, at the same time: pulpy, seedy, tepid, fly soup.
Wurlitzer, for all the tonal character that they put into their keyboards, simply did not care about hum. (At least until the 140b came out…and even then, they started backsliding on the 200…but this is a digression for another article.) You can tell from the decisions that they made in designing the amplifier. For instance:
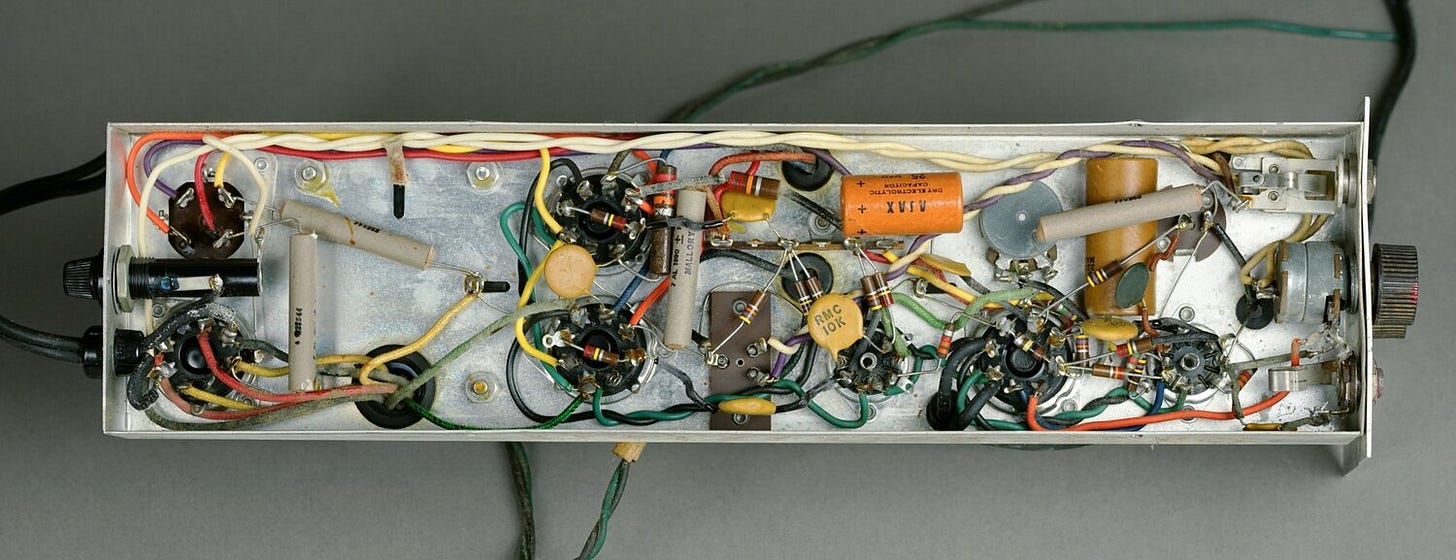
Switch wires routed all around the chassis, mounted next to sensitive preamp connections
Appallingly long leads on preamp components
Preamp wires that share a harness with switch wires
Heaters that are neither center-tapped nor twisted
Poorly-positioned phono inputs
Ground loops
Basically, you can replace every single component in the amp, and it will still hum unless you address the wiring as well.
The design of the Wurlitzer electronic piano does require some compromise. For instance, the chassis is small and narrow, so switch wires will necessarily be closer to signal wires in a Wurlitzer 120 amp than in a Fender Bassman. And, as a mass-produced item, ease of assembly was more of a priority than a silent noise floor.
Regardless, all of Wurlitzer’s poor layout decisions are reversible. It just takes time, patience, Teflon wire, and sometimes a little bit of metalwork. (Teflon wire, specifically, because certain wire jacketing will start to melt if you breathe on it the wrong way. You don’t want to spend 45 minutes positioning picture-perfect twisted heater wires only to melt the PVC jackets together when you solder them down. And, if you don’t notice that they were melted together, you will see literal flames coming from the chassis when you turn the amp on. Don’t ask me how I know!!)
GENERAL OPTIONS FOR RE-ROUTING WIRES
SWITCH WIRES
Good: Replace the original switch wires with twisted wire, tucked into the corner of the chassis. Route other wiring and all components as far away from the switch wires as possible.
Better: Mount a four-pin Molex plug near the power transformer, and use that for switch connections and (if appropriate to the amplifier model) the pilot light as well. Or, instead of using a switch on the potentiometer, mount a new on/off switch on the chassis near the fuse.
HEATER WIRES
Like switch wires, heater wires should be twisted and tucked into the corners of the chassis. The heater circuit should also be center-tapped. In old amps, like all Wurlitzer tube amps, one wire was the 6.3 V wire, and the other connected to ground. New amps have a center tap wire, which connects to ground so that each heater wire carries half of the heater voltage. Minimizing the voltage in this way makes it less likely to end up in the signal path.
If the transformer does not have a center tap, it is possible to make a virtual center tap. In this case, both heater wires connect to ground through a resistor. I use 82 ohm 2W, although similar values work just as well. At 2W, this is a slightly oversized power rating, but I prefer the way that the larger resistors mount in a point-to-point circuit. They have less exposed lead and they hold their position very well, so they are more likely to stay where you put them.
There is one exception to center-tapping the heater circuit: the Wurlitzer 145. The 145’s oddball 6K11 preamp tube has a heater pin next to a grid pin. Thanks to this topology, this heater pin must be grounded. Otherwise, heater hum will enter the signal path due to its proximity to the sensitive tube grid. For this reason, a center tap introduces more noise in a 145 amp than the original grounded heater method. (Twisting the wires, however, will still improve the noise floor in a 145.)
(Read more about heater wires here.)
EXCESSIVELY LONG LEADS ON PREAMP COMPONENTS
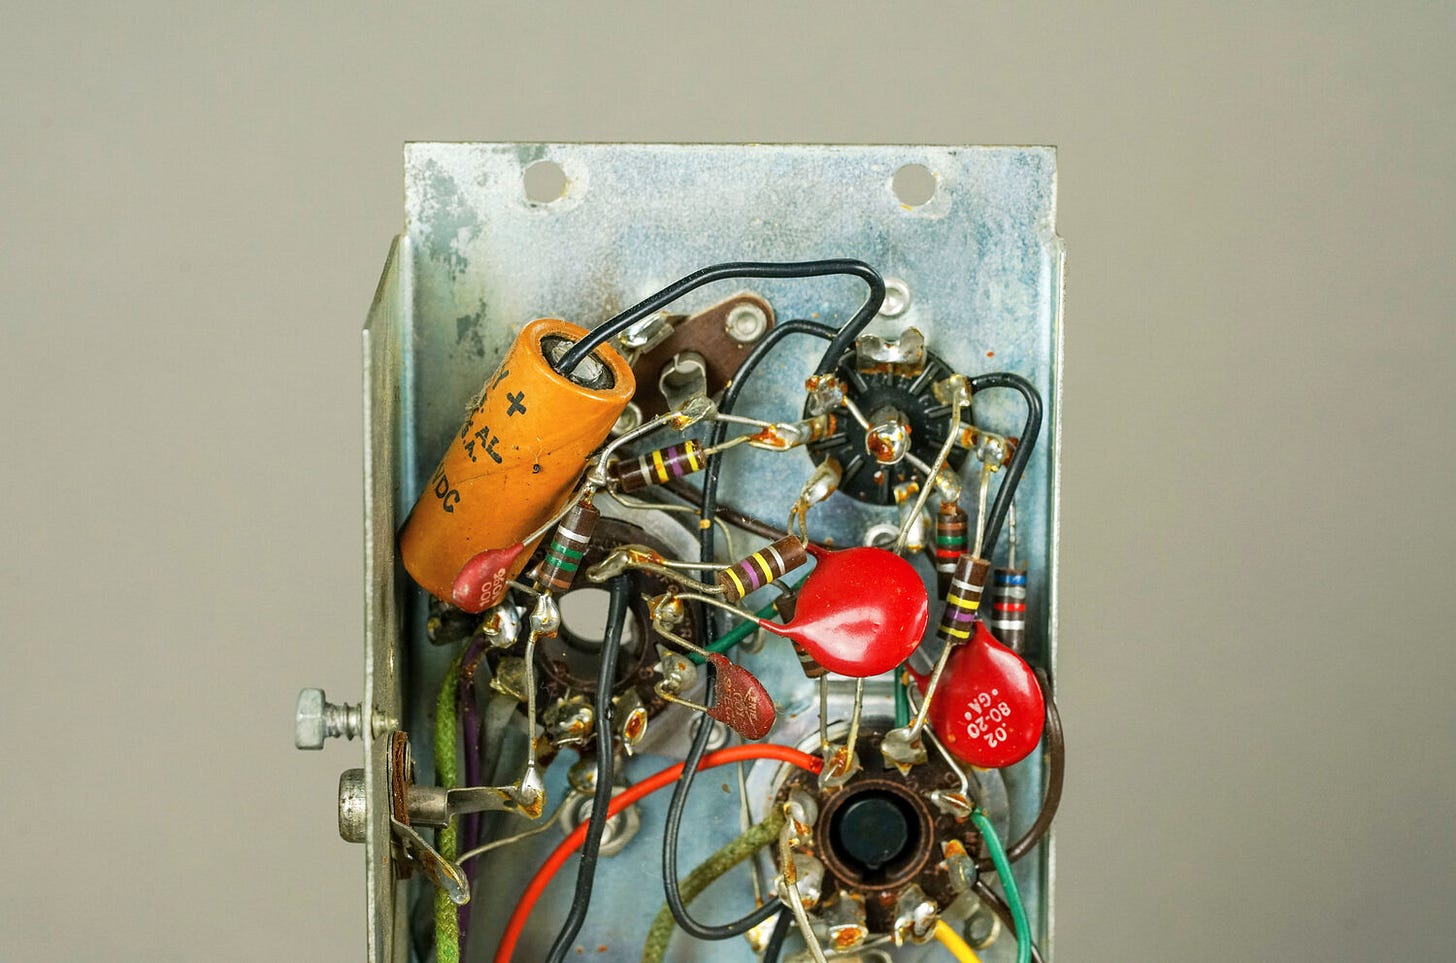
Grid connections are the most sensitive part of the preamp, and the input grid is the most sensitive of all. Only one thing should mount on the grid pin: the grid stopper. The grid stopper should mount directly on the pin, with no exposed lead between the resistor and the pin. The grid leak resistor should not mount on the grid pin itself, but should be positioned on the opposite (input jack) side of the grid stopper. This is contrary to the schematic, but that’s okay. (The schematic is not infallible. See: the death cap, the two-prong power plug, the heaters that are not center-tapped, etc. etc.)
In Wurlitzer tube amps, input connections tend to be unnecessarily long and circuitous. I always add an extra lug strip between the input jack and the grid pin, so that I can create the most direct path possible from the input jack to the grid. This requires drilling a mounting hole in the chassis, but it is worth the effort.
In fact, I usually add quite a few extra lug strips to the chassis. The goal is to keep components for each triode section generally together, but out of the way of the other triode sections. The more components that randomly criss-cross the chassis, the more opportunities they have to interfere with one another.
For instance, consider one component that is important to keep isolated: the coupling cap that brings the tremolo signal from the oscillator to the power tubes. If it is too close to the phase inverter circuit, it will introduce noise.

PHONO INPUTS
Due to being generally useless, phono inputs are a widely overlooked feature of Wurlitzer amps. However, rearranging the piano input without addressing the phono input is like installing motion lights, deadbolts, and a security camera on your front door, and then sledgehammering a large hole in the side of your house. Sure, there’s probably a scenario where an improvised side entrance is extremely convenient, like if you’re carrying something heavy and left the keys to the deadbolt in your car. But the other 99% of the time, the hole is just a VIP entrance for mosquitos and stray animals. And, likewise, the phono input is a welcome mat for noise.
You can keep the phono input if you can avoid routing switch wires or other noisy components nearby. In the Wurlitzer 120, this is impossible without significant modification. In other models, such as the 140b, the phono input does not introduce noise, and can be left undisturbed.
The best use of a phono input is a test output for troubleshooting malfunctioning amps—but this is also a topic for another article.
GROUND LOOPS
Sometimes, grounding two components in two different places on the chassis creates a ground loop. If the conductor that leads to ground has some resistance (this includes wires, which have a small but measurable resistance), that resistance would lead to a voltage drop. Thanks to the voltage drop, instead of connecting straight to ground potential as intended, the two components are now, unintentionally, connecting to each other. The circuits that the components belong to are now free to interfere with one another, introducing hum into the signal.
The most efficient way to avoid ground loops is by grounding everything to one point. This is called a star ground. Of course, Wurlitzer did not employ star grounds. There are grounds everywhere in a Wurlitzer tube amp: the wiring harness mounting ring, the tube socket mounting ring, the capacitor can mounting pins, stray metal tabs in the chassis, the phono input jack and the piano input jack. The grounds seem relatively standardized—that is, things usually ground in the same spot from amp to amp. However, this scheme does not follow the depiction of grounds in the schematic, and there is no apparent rhyme or reason that an observer could extrapolate. It’s just a ground scheme that tends to result in a reasonably acceptable noise floor.
This leads to a problem if you want to modify the amp. If you have to remove or replace more than a handful of components, it becomes extremely difficult to keep to the original ground scheme. First of all, preserving the ground scheme is like preserving an old french fry you found under the passenger seat of your car. Just because it’s been around for a few months or years doesn’t make it significant or valuable. Second, the new components that you are using probably have shorter leads than the original components, so they may not reach the grounds anymore. Third, since the ground system is essentially random, it’s hard to keep track of where the original grounds were in the first place. Once you start revising the original ground scheme, intentionally or unintentionally, you risk creating new ground loops.
The best solution is to lift the original grounds, and set up a star ground scheme. The star ground could be the input jack ground, since it is riveted to the chassis. Or, you could install a new isolated input jack, and put a separate star ground nearby. (This could be a good option if the input jack is extremely corroded and needs to be replaced anyway.)
Thank you for subscribing to Keyboard Notes! I hope you enjoyed this article. I am very happy to be updating this newsletter again! See you next week!


