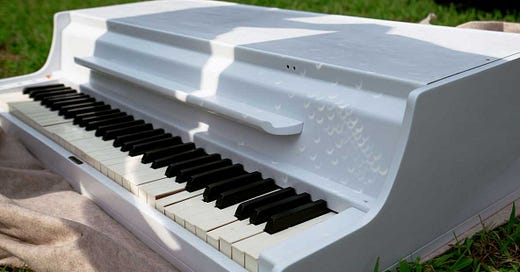
Welcome to Part 2 of our series on painting! We started with tips on how to paint a Wurlitzer 200-series lid, or anything plastic. Today we will explain how we paint older models of Wurlitzer and other wooden objects.
The main difference between painting wood and painting plastic is how you prep the object. When painting plastic, you just have to clean and scuff the surface, removing any gloss or oils so that the paint sticks better. You could follow the same procedure when painting wood. However, many wood projects come out much better when you sand the surface smooth.
Before you begin, think for a moment about what you want the painting project to achieve. Do you just want to add color to your keyboard, or do you want it to have a specific (perfect) finish? The more perfect you want the paint job to look, the more sanding you’re in for. The more sanding you do, the more time you should budget, and the more sandpaper you should buy. (Trust me: you do not want to put your project on pause just to go back to Home Depot for more sandpaper.) On the other hand, if you don’t want or need the keyboard to look perfect, that’s okay too. It’s your keyboard! You are the only person who has to be happy with it.
I will begin with the most important tip. Take the keys out before you paint. Take the lid off the keyboard. Remove each key. Put them somewhere safe. Vacuum the keybed. Now you’re free to paint! Why is it that every single 140/145 I have ever seen with a prior paint job have paint on the keys? Leaving the keys in place makes painting harder, not easier. It doesn’t even save time, because you have to tape them off??? (I’m not talking about rock-n-roll paint jobs completed with stylish, self-conscious apathy. There is always evidence that the keys were taped off! This is deeply uncool! Sorry!!) If you have a 140b and you take the keys out before painting it, congratulations!!! because your paint job is now in the top 1% all-time best 140b paint jobs!
MATERIALS TO COLLECT BEFORE YOU BEGIN
Small bags to hold screws
Larger bags to hold hardware
Painter’s tape
A sharpie
Latex gloves
A product for cleaning
Lint-free towels
Obviously, you will need paint and sandpaper, etc., which I will discuss in later sections. This list is for stuff you need before you even approach the keyboard with paint on your mind. You’ll probably need to spend a least a weekend sanding and painting, and if you just leave all the screws in a little pile somewhere, something will get lost. (Trust me—I’ve lost so many little parts that, if I ever found them all, I could assemble a whole new Wurlitzer.)
HOW TO DISASSEMBLE THE KEYBOARD
The first step is to take the keyboard apart as completely as possible. First, take the lid off and remove everything inside that is practical to remove. In addition to the keys, this includes the amplifier, the key bed, and the wiring harness. You may want to also remove parts of the mechanical action. Unlike 200-series models, the mechanical action in earlier Wurlitzer keyboards cannot be removed as a whole. You will need to unscrew the individual pieces.


